Add Sizes
The Sizes collection has two important fields:
-
Size: This field is where you write a descriptive phrase for the size. For example, for our dummy product 'earbuds,' we have two sizes: "Small" and "Medium." For the medium size, we used the phrase "Medium - Best for adults" and for the small size, "Small - Best for Teen age". Use a clear description that helps customers understand the fit.
-
Nomenclature: This field is used to set a short, standardized term for the size. For example, "MD" for medium and "SM" for small. These nomenclatures are displayed on the front end of the app.
Note: The nomenclature is visible to customers and helps streamline size selection.
Adding a New Size
To add a new size:
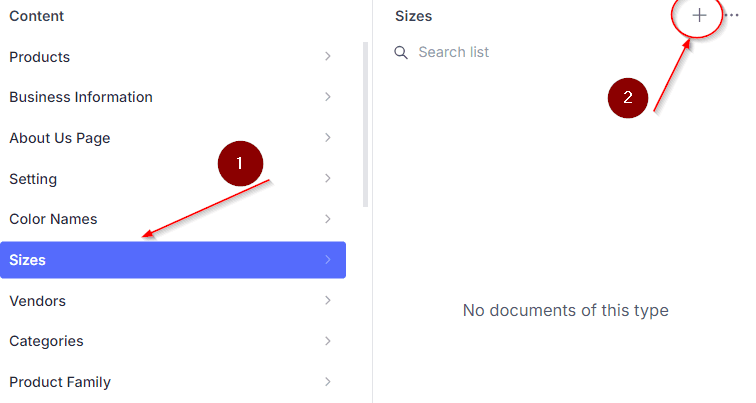
- Navigate to the Sizes collection.
- Click on the + icon.
- A new interface will appear on the right side.
- Fill in the Size field with a descriptive phrase and the Nomenclature field with a short term for the size (e.g., "MD" for medium).
- Once both fields are filled, click Publish to save and publish the new size.
Your size will now be available for use in product collection.

Attaching a Size to a Product
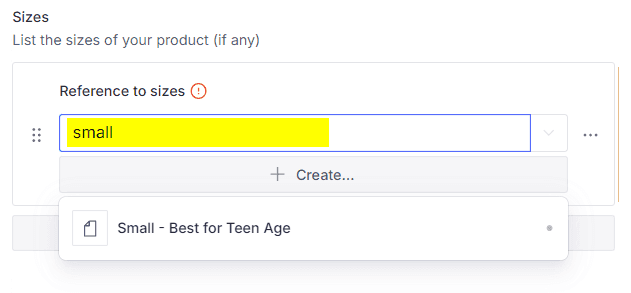
- Go to the Product collection and scroll down to the Sizes field.
- Click on the Add Item button.
- In the input field, type "small" (or the size you recently added).
- The size will appear in the dropdown suggestion list.
- Click on the size to attach it to the product.
The size will now be linked to the product and ready for display on the product page.
